
티스토리 뷰
프로젝트 요구사항

프로젝트 기본 구조
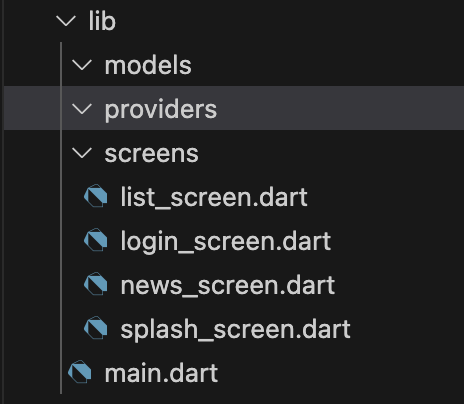
- models 폴더엔 Todo 모델과 News 모델이 들어갈 것이다.
- providers 폴더엔 데이터 관련 기능을 따로 빼서 작성한 파일이 들어갈 것이다.
자동로그인 구현
SharedPreferences란?
SharedPreferences(shared_prefs)는
저장해야할 데이터 양이 적거나 아주 간단한 경우 사용할 수 있는 기법이다.
shared_prefs는 키-값 방식으로 데이터를 저장하는 방법이다.
기기 내 xml 파일을 통해 앱의 데이터를 저장하는 방식인데
파일에 데이터를 쓰는 방식이기 때문에 앱을 껐다 켜도 데이터가 유지된다.
많은 양의 데이터를 관리하기 어려우며, 키-값 방식 외의 구조 설계가 불가능하므로
자동 로그인이나 도움말 스킵 여부 등 간단한 형태의 데이터를 다루든 도구로써 쓰인다.
이를 이용해 자동 로그인 기능을 구현할 거지만
아이디와 패스워드를 입력해 로그인하는 것이 아닌,
로그인 버튼만 누르면 로그인 처리가 되도록 하는 가짜 로그인 기능을 구현할 것이다.
SplashScreen
Splash 화면은 앱을 처음 켰을 때 브랜드 로고가 나타나는 일종의 인트로 화면으로
로고를 보여주는 시간동안 필요한 정보를 로드한다.
로그인 정보가 있다면 ListScreen으로 이동하고,
저장된 로그인 정보가 없다면 LoginScreen으로 이동할 것이다.
SplashScreen UI
import 'package:flutter/material.dart';

class SplashScreen extends StatefulWidget {
  const SplashScreen({super.key});

  @override
  State<SplashScreen> createState() => _SplashScreenState();
}

class _SplashScreenState extends State<SplashScreen> {
  @override
  Widget build(BuildContext context) {
    return const Scaffold(
      body: Center(
        child: Column(
          mainAxisAlignment: MainAxisAlignment.center,
          children: [
            Text(
              'SplashScreen',
              style: TextStyle(fontSize: 20),
            ),
            Text(
              '나만의 일정 관리: TodoList',
              style: TextStyle(fontSize: 20),
            )
          ],
        ),
      ),
    );
  }
}
initState()를 활용해 SplashScreen이 빌드될 때 로그인 정보를 불러와 확인하고
다음 화면으로 넘어가는 기능을 작성하기 위해 StatefulWidget을 선언했다.
initState()
@override
  void initState() {
    super.initState();
    Timer(Duration(seconds: 2), () {moveScreen()})
  }
앱이 처음 실행될 때,
2초 내 moveScreen()이라는 함수가 동작하도록 선언했다.
moveScreen()
void moveScreen() async{
      await checkLogin().then(login){
        if await checkLogin().then()((isLogin){
          if(isLogin){
            Navigator.of(context).pushReplacement(MaterialPageRoute(builder:(context)=>ListScren()));
          } else{
            Navigator.of(context).pushReplacement(MaterialPageRoute(builder:(context)=>LoginScren()));
          }
        });
      }
    }
checkLogin()에서 반환한 isLogin의 값이 참이라면 ListScreen으로,
거짓이라면 로그인 기록이 없다는 뜻이므로 LoginScreen으로 이동한다.
checkLogin이 수행된 후에 다음 기능이 동작하도록 설정해야하므로
moveScreen()함수는 비동기(async)로 설정해야한다.
checkLogin()
shared_preferences | Flutter Package
Flutter plugin for reading and writing simple key-value pairs. Wraps NSUserDefaults on iOS and SharedPreferences on Android.
pub.dev
shared_prefs 사용을 위한 패키지 설치
Future<bool> checkLogin() async {
    SharedPreferences prefs = await SharedPreferences.getInstance();
    bool isLogin = prefs.getBool('isLogin') ?? false;
    return isLogin;
  }
해당 함수는 isLogin이라는 bool 값을 리턴한다.
이 값을 가져오는데 시간이 걸리기 때문에 이 또한 비동기로 처리했으며,
그 때문에 해당 함수는 Future 타입으로 정의했다.
.getIntance()로 기기 내 shared_prefs객체를 가져온 뒤,
isLogin이라는 bool 형태 값을 getBool로 가져온 후
isLogin값이 null인 경우 isLogin을 false로 가져온다.
SplashScreen()
import 'dart:async';
import 'package:flutter/material.dart';
import 'package:flutter_application_1/screens/list_screen.dart';
import 'package:flutter_application_1/screens/login_screen.dart';
import 'package:shared_preferences/shared_preferences.dart';

class SplashScreen extends StatefulWidget {
  const SplashScreen({super.key});

  @override
  State<SplashScreen> createState() => _SplashScreenState();
}

class _SplashScreenState extends State<SplashScreen> {
  @override
  void initState() {
    super.initState();
    Timer(const Duration(seconds: 2), () {
      moveScreen();
    });
  }

  Future<bool> checkLogin() async {
    SharedPreferences prefs = await SharedPreferences.getInstance();
    bool isLogin = prefs.getBool('isLogin') ?? false;
    return isLogin;
  }

  void moveScreen() async {
    await checkLogin().then((isLogin) {
      if (isLogin) {
        Navigator.of(context).pushReplacement(
            MaterialPageRoute(builder: (context) => const ListScreen()));
      } else {
        Navigator.of(context).pushReplacement(
            MaterialPageRoute(builder: (context) => const LoginScreen()));
      }
    });
  }

  @override
  Widget build(BuildContext context) {
    return const Scaffold(
      body: Center(
        child: Column(
          mainAxisAlignment: MainAxisAlignment.center,
          children: [
            Text(
              'SplashScreen',
              style: TextStyle(fontSize: 20),
            ),
            Text(
              '나만의 일정 관리: TodoList',
              style: TextStyle(fontSize: 20),
            )
          ],
        ),
      ),
    );
  }
}
isLogin의 값이 false이므로 SplashScreen을 2초 띄운 후,
LoginScreen()으로 넘어가게 된다.
LoginScreen()
import 'package:flutter/material.dart';
import 'package:flutter_application_1/screens/list_screen.dart';
import 'package:shared_preferences/shared_preferences.dart';

class LoginScreen extends StatelessWidget {
  const LoginScreen({super.key});

  Future setLogin() async {
    SharedPreferences prefs = await SharedPreferences.getInstance();
    prefs.setBool('isLogin', true);
  }

  @override
  Widget build(BuildContext context) {
    return Scaffold(
      appBar: AppBar(
        title: const Text('로그인', style: TextStyle(color: Colors.white)),
        backgroundColor: Colors.blue,
      ),
      body: Center(
          child: Container(
        padding: const EdgeInsets.fromLTRB(0, 0, 0, 40),
        width: MediaQuery.of(context).size.width * 0.85,
        child: ElevatedButton(
            onPressed: () {
              setLogin().then((_) {
                Navigator.of(context).pushReplacement(MaterialPageRoute(
                    builder: (context) => const ListScreen()));
              });
            },
            child: const Text('로그인')),
      )),
    );
  }
}
LoginScreen()의 '로그인'버튼을 누르면 isLogin을 true로 설정해,
앱을 새로고침하면 SplashScreen에서 바로 ListScreen()으로 이동하게 된다.
Todo 기능 구현
Todo 모델 만들기
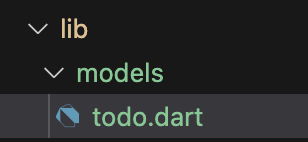
todo 모델을 작성해보자.
class Todo {
  late int? id;
  late String title;
  late String description;

  Todo({this.id, required this.title, required this.description});

  Map<String, dynamic> toMap() {
    return {
      'id': id,
      'title': title,
      'description': description,
    };
  }

  Todo.fromMap(Map<dynamic, dynamic>? map) {
    id = map?['id'];
    title = map?['title'];
    description = map?['description'];
  }
}
Todo 클래스의 내엔 id, title, description이란 3개의 매개변수가 존재하는데,
'id'는 선택적 매개변수이며, 'title'과 'description'은 필수 매개변수이다.
Todo모델 내 toMap()과 fromMap() 함수가 있다.
toMap()은 Todo데이터를 외부로 보내기 위해 양식을 맞추는 역할이고,
fromMap()은 받아오는 데이터를 Todo모델로 변환하는 기능을 수행한다.
일반적으로 네트워크를 통해 주고받는 데이터 양식은 Json으로,
이는 플러터에서 Map<String, dynamic>형태로 표현된다.
ListScreen UI
import 'package:flutter/material.dart';
import 'package:flutter_application_1/models/todo.dart';

class ListScreen extends StatefulWidget {
  const ListScreen({super.key});

  @override
  State<ListScreen> createState() => _ListScreenState();
}

class _ListScreenState extends State<ListScreen> {
  List<Todo> todos = [];
  bool isLoading = true;

  @override
  void initState() {
    super.initState();
    setState(() {
      isLoading = false;
    });
  }

  @override
  Widget build(BuildContext context) {
    return Scaffold(
        appBar: AppBar(
          title: const Text('할 일 목록', style: TextStyle(color: Colors.white)),
          backgroundColor: Colors.blue,
          actions: [
            InkWell(
              onTap: () {},
              child: Container(
                padding: const EdgeInsets.all(5),
                child: const Column(
                  mainAxisAlignment: MainAxisAlignment.center,
                  children: [Icon(Icons.book), Text("뉴스")],
                ),
              ),
            )
          ],
        ),
        floatingActionButton: FloatingActionButton(
          child: const Text(
            '+',
            style: TextStyle(fontSize: 25),
          ),
          onPressed: () {},
        ),
        body: isLoading
            ? const Center(
                child: CircularProgressIndicator(),
              )
            : ListView.separated(
                itemBuilder: (context, index) {
                  return ListTile(
                    title: Text(todos[index].title),
                    onTap: () {},
                    trailing: SizedBox(
                        width: 80,
                        child: Row(
                          mainAxisAlignment: MainAxisAlignment.end,
                          children: [
                            Container(
                              padding: const EdgeInsets.all(5),
                              child: InkWell(
                                child: const Icon(Icons.edit),
                                onTap: () {},
                              ),
                            ),
                            Container(
                              padding: const EdgeInsets.all(5),
                              child: InkWell(
                                child: const Icon(Icons.delete),
                                onTap: () {},
                              ),
                            )
                          ],
                        )),
                  );
                },
                separatorBuilder: (context, index) {
                  return const Divider();
                },
                itemCount: todos.length));
  }
}
목록화면 구현을 위해 ListView.separated를 활용했다.
ListView.separated는 List의 각 요소들 사이에 구분자(Divider)를 넣어준다.
구분자는 플러터 기본 Divider()를 사용했다.
isLoading값이 true면 중앙에 로딩 중임을 알리는 원(CircularProgressIndicator())이 돌아간다.
initState에서 isLoading값을 false로 설정함으로써 무한로딩을 멈춰줬다.
Todo provider 작성
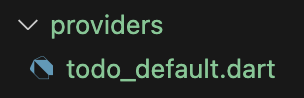
Provider는 외부 데이터 영역과의 통신을 담당하는 코드이다.
Provider에서 작성해야하는 기능들
1) 모든 Todo를 가져오는 기능, 2) 특정 Todo를 가져오는 기능,
3) Todo 생성, 4) 특정 Todo 수정, 5) Todo 삭제
import 'package:flutter_application_1/models/todo.dart';

class TodoDefault {
  List<Todo> dummyTodos = [
    Todo(id: 1, title: '플러터 공부', description: '모르는게 너무 많다'),
    Todo(id: 2, title: '블로그 쓰기', description: '공부한 걸 기록하자'),
    Todo(id: 3, title: '회사가기', description: '무스마 본사로 미팅을 가자'),
    Todo(id: 4, title: '자기', description: '효율적인 작업을 위해 잠 보충은 중요하다'),
  ];

  List<Todo> getTodos() {
    return dummyTodos;
  }

  Todo getTodo(int id) {
    return dummyTodos[id];
  }

  Todo addTodo(Todo todo) {
    Todo newTodo = Todo(
        id: dummyTodos.length + 1,
        title: todo.title,
        description: todo.description);
    dummyTodos.add(newTodo);
    return newTodo;
  }

  void deleteTodo(int id) {
    for (int i = 0; i < dummyTodos.length; i++) {
      if (dummyTodos[i].id == id) {
        dummyTodos.removeAt(i);
      }
    }
  }

  void updateTodo(Todo todo) {
    for (int i = 0; i < dummyTodos.length; i++) {
      if (dummyTodos[i].id == todo.id) {
        dummyTodos[i] = todo;
      }
    }
  }
}
deleteTodo나 updateTodo를 보면 모든 Todos아이디를 순차적으로 확인해
그 중 넘겨준 아이디와 일치한다면 그 아이디에 해당하는 내용을 지우거나 수정을 하는 방식이다.
Provider와 화면 연결
import 'dart:async';

import 'package:flutter/material.dart';
import 'package:flutter_application_1/models/todo.dart';
import 'package:flutter_application_1/providers/todo_provider.dart';

class ListScreen extends StatefulWidget {
  const ListScreen({super.key});

  @override
  State<ListScreen> createState() => _ListScreenState();
}

class _ListScreenState extends State<ListScreen> {
  List<Todo> todos = [];
  TodoDefault todoDefault = TodoDefault();
  bool isLoading = true;

  @override
  void initState() {
    super.initState();
    Timer(const Duration(seconds: 2), () {
      todos = todoDefault.getTodos();
      setState(() {
        isLoading = false;
      });
    });
  }
데이터를 가져왔을 때, isLoading을 false로 설정해 dummyTodos를 화면에 출력한다.
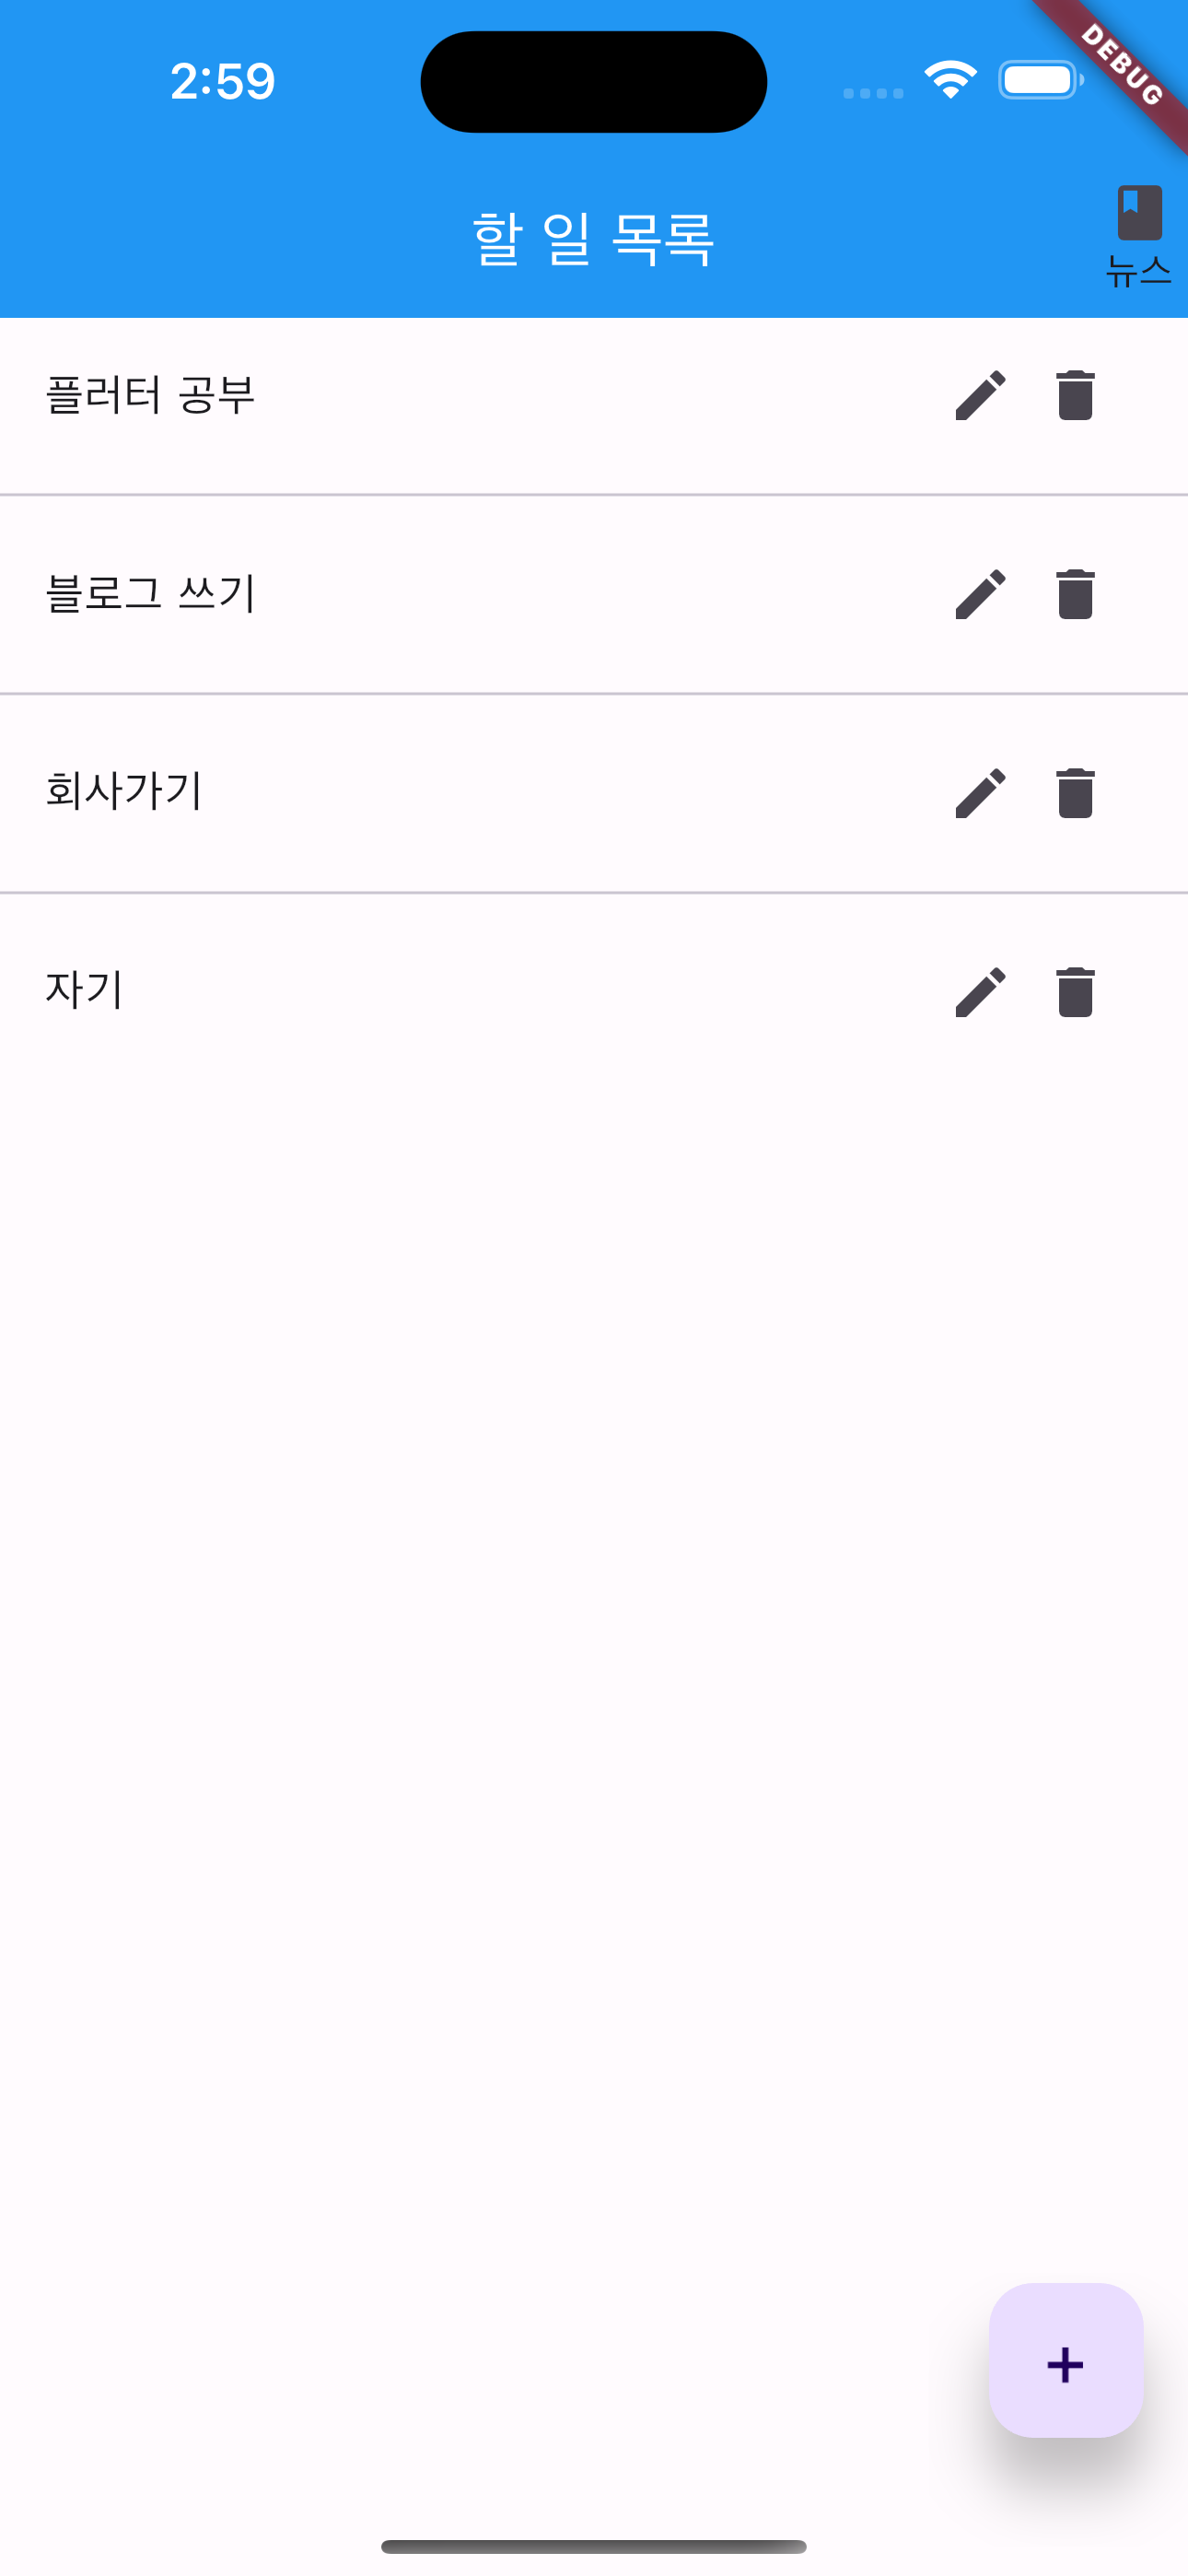
ListScreen화면
Todo 추가
floatingActionButton: FloatingActionButton(
          child: const Text(
            '+',
            style: TextStyle(fontSize: 25),
          ),
          onPressed: () {
            showDialog(
                context: context,
                builder: (BuildContext context) {
                  String title = '';
                  String description = '';
                  return AlertDialog(
                    title: const Text('할 일 추가'),
                    content: SizedBox(
                      height: 200,
                      child: Column(children: [
                        TextField(
                          onChanged: (value) {
                            title = value;
                          },
                          decoration: const InputDecoration(labelText: '제목'),
                        ),
                        TextField(
                          onChanged: (value) {
                            description = value;
                          },
                          decoration: const InputDecoration(labelText: '설명'),
                        ),
                      ]),
                    ),
                    actions: [
                      TextButton(
                          onPressed: () {
                            setState(() {
                              todoDefault.addTodo(
                                Todo(title: title, description: description),
                              );
                            });
                            Navigator.of(context).pop();
                          },
                          child: const Text('추가')),
                      TextButton(
                          onPressed: () {
                            Navigator.of(context).pop();
                          },
                          child: const Text('취소'))
                    ],
                  );
                });
          },
        ),
Todo를 생성하기 위한 버튼으로 FloatingActionButton을 사용했다.
해당 버튼의 onPressed에 showDialog()라는 함수를 연결해
해당 버튼을 누르면 다이얼로그를 띄우도록 했다.
showDialog()에서 띄울 다이얼로그를 AlterDialog로 정의했다.
title: 다이얼로그 제목 / content: 다이얼로그 내용 / actions: 다이얼로그 버튼 에 해당한다.
Textfield에 제목과 설명을 입력하면 그 입력값 value는
정의했던 String 변수들 title과 description에 들어가게 된다.
actions에 들어갈 버튼들은 Textbutton으로 정의했다.
추가 버튼에는 todoDefault.addTodo()로 Todo를 추가하도록 했고,
취소버튼은 뒤로 가기(ListScreen으로)만을 연결했다.
특정 Todo 확인
return ListTile(
                    title: Text(todos[index].title),
                    onTap: () {
                      showDialog(
                          context: context,
                          builder: (BuildContext context) {
                            return SimpleDialog(
                              title: const Text('할 일'),
                              children: [
                                Container(
                                  padding: const EdgeInsets.all(10),
                                  child: Text('제목: ${todos[index].title}'),
                                ),
                                Container(
                                  padding: const EdgeInsets.all(10),
                                  child:
                                      Text('설명: ${todos[index].description}'),
                                ),
                              ],
                            );
                          });
                    },
각각의 Todo는 ListTile의 형태로,
해당 ListTile을 탭하면 해당 Todo정보를 볼 수 있도록 할 것이다.
Todo의 title과 description만 나타낼 것이므로
Simpledialog로 Todo정보를 띄웠다.
특정 Todo 수정
Container(
                              padding: const EdgeInsets.all(5),
                              child: InkWell(
                                child: const Icon(Icons.edit),
                                onTap: () {
                                  showDialog(
                                      context: context,
                                      builder: (BuildContext context) {
                                        String title = todos[index].title;
                                        String description =
                                            todos[index].description;
                                        return AlertDialog(
                                          title: const Text('할 일 수정하기'),
                                          content: SizedBox(
                                            height: 200,
                                            child: Column(
                                              children: [
                                                TextField(
                                                  onChanged: (value) {
                                                    title = value;
                                                  },
                                                  decoration: InputDecoration(
                                                      hintText:
                                                          todos[index].title),
                                                ),
                                                TextField(
                                                  onChanged: (value) {
                                                    description = value;
                                                  },
                                                  decoration: InputDecoration(
                                                      hintText: todos[index]
                                                          .description),
                                                ),
                                              ],
                                            ),
                                          ),
                                          actions: [
                                            TextButton(
                                                onPressed: () async {
                                                  Todo newTodo = Todo(
                                                      description: description,
                                                      id: todos[index].id,
                                                      title: title);
                                                  setState(() {
                                                    todoDefault
                                                        .updateTodo(newTodo);
                                                  });
                                                  Navigator.of(context).pop();
                                                },
                                                child: const Text('수정')),
                                            TextButton(
                                                onPressed: () {
                                                  Navigator.of(context).pop();
                                                },
                                                child: const Text('취소'))
                                          ],
                                        );
                                      });
                                },
                              ),
                            ),
Icons.edit버튼을 눌러 수정창을 열 수 있다.
버튼을 누르면 AlterDialog를 띄워 title과 Description을 수정한다.
Todo를 추가할 때와 같이 Textfield의 입력값(수정값)은 각각의 변수에 저장된다.
수정의 편리성을 위해 Textfield에 hintText로 이전 title과 description을 나타내었다.
특정 Todo 삭제
Container(
                              padding: const EdgeInsets.all(5),
                              child: InkWell(
                                child: const Icon(Icons.delete),
                                onTap: () {
                                  showDialog(
                                      context: context,
                                      builder: (BuildContext context) {
                                        return AlertDialog(
                                          title: const Text('할 일 삭제하기'),
                                          content: Container(
                                            child: const Text('삭제하시겠습니까?'),
                                          ),
                                          actions: [
                                            TextButton(
                                                onPressed: () async {
                                                  setState(() {
                                                    todoDefault.deleteTodo(
                                                        todos[index].id ?? 0);
                                                  });
                                                  Navigator.of(context).pop();
                                                },
                                                child: const Text('삭제')),
                                            TextButton(
                                                onPressed: () {
                                                  Navigator.of(context).pop();
                                                },
                                                child: const Text('취소'))
                                          ],
                                        );
                                      });
                                },
                              ),
                            )
Icons.delete에 해당하는 삭제버튼을 누르면 삭제창을 띄운다.
삭제 기능 또한 Provider와 연결하여 "삭제"를 누르면 Todo가 삭제되도록 하는게 끝이다.
sqlite

Todo 기능을 구현하기 위해 sqlite를 쓸 것이다.
앱을 껐다 켜도 Todo 목록은 남아 있어야 하기 때문에 데이터베이스에 저장되야한다.
sqlite는 경량화된 데이터베이스 SW이다.
스펙이 낮고 동접자 수 제한 등의 요소 때문에 서버용 데이터베이스론 사용할 수 없지만,
가볍다는 특징 때문에 모바일 기기의 로컬용 데이터베이스론 좋은 선택지이다.
sqlite에선 관계형 데이터베이스 모델을 그대로 적용할 수 있다.
sqflite | Flutter Package
Flutter plugin for SQLite, a self-contained, high-reliability, embedded, SQL database engine.
pub.dev
sqlite는 sqlflite라는 패키지를 통해 사용할 수 있다.
작성
sqlite와 연동하여 Todo목록 앱을 완성해보자.
import 'package:flutter_application_1/models/todo.dart';
import 'package:sqflite/sqflite.dart';

class TodoSqlite {
  late Database db;

  Future initDb() async {
    db = await openDatabase('my_db.db');
    await db.execute(
      'CREATE TABLE IF NOT EXISTS MyTodo (id INTEGER PRIMARY KEY AUTOINCREMENT NOT NULL, title TEXT, description TEXT)',
    );
  }

  Future<List<Todo>> getTodos() async {
    List<Todo> todos = [];
    List<Map> maps =
        await db.query('MyTodo', columns: ['id', 'title', 'description']);
    for (var map in maps) {
      todos.add(Todo.fromMap(map));
    }
    return todos;
  }

  Future<Todo?> getTodo(int id) async {
    List<Map> map = await db.query('MyTodo',
        columns: ['id', 'title', 'description'],
        where: 'id = ?',
        whereArgs: [id]);
    if (map.isNotEmpty) {
      return Todo.fromMap(map[0]);
    }
    return null;
  }

  Future addTodo(Todo todo) async {
    int id = await db.insert('MyTodo', todo.toMap());
  }

  Future deleteTodo(int id) async {
    await db.delete('MyTodo', where: 'id = ?', whereArgs: [id]);
  }

  Future updateTodo(Todo todo) async {
    await db
        .update('MyTodo', todo.toMap(), where: 'id = ?', whereArgs: [todo.id]);
  }
}
initDb()에서 sqflite패키지를 활용해 기기 내 데이터베이스 파일과 연결을 수행한다.
파일이 없는 경우 자동으로 생성되며, 이 코드에선 데이터베이스 파일의 이름을 my_db.db로 설정했다.
연결한 데이터베이스는 db라는 인스턴스로 관리한다.
db인스턴스로 각종 SQl쿼리를 실행시킬 수 있다.
처음 실행하는 쿼리는 테이블을 생성하는 쿼리이다.
db.execute()에서 CREATE TABLE 명령어를 수행해 테이블을 생성한다.
테이블 중복생성을 막기 위해 IF NOT EXISTS를 설정하고, Todo의 id값을 자동으로 생성하게 설정했다.
모든 Todo 데이터를 가져오기 위해선 db.query를 통해 테이블과 컬럼을 설정해 가져온다.
이때 List<Map<String, dynamic>> 형태로 가져오기 때문에 앞서 모델에서 정의한
fromMap 함수를 통해 이들을 List<Todo> 형태로 변환해 가져온다.
특정 Todo하나를 가져올 때도 동일하다.
생성이나 삭제, 수정은 sqflite에 포함된 함수를 이용하면 간단히 구현이 가능하다.
생성이나 수정을 할 땐 toMap()으로 Todo를 Map<String, dynamic>으로 반환한다.
sqlite provider와 화면 연결
TodoDefault로 설정되어 있는 부분만 TodoSqlite로 수정하면 된다.
class _ListScreenState extends State<ListScreen> {
  List<Todo> todos = [];
  TodoSqlite todoSqlite = TodoSqlite();
  bool isLoading = true;

  Future initDb() async {
    await todoSqlite.initDb().then((value) async {
      todos = await todoSqlite.getTodos();
    });
  }

  @override
  void initState() {
    super.initState();
    Timer(const Duration(seconds: 2), () {
      initDb().then((_) {
        setState(() {
          isLoading = false;
        });
      });
    });
  }
TodoDefault를 Todosqlite로 수정한 다음, initDb()라는 메서드를 하나 추가한다.
TodoSqlite의 initDb()를 수행하고, 이후 getTodos()를 실행하여
데이터베이스를 생성 후 데이터베이스에 저장된 할 일들을 todos에 저장한다.
이는 선행되어야 하는 작업이므로 initDb()는 비동기로 작성한다.
@override
Widget build(BuildContext context) {
return Scaffold(
appBar: AppBar(
title: const Text('할 일 목록', style: TextStyle(color: Colors.white)),
backgroundColor: Colors.blue,
actions: [
InkWell(
onTap: () {},
child: Container(
padding: const EdgeInsets.all(5),
child: const Column(
mainAxisAlignment: MainAxisAlignment.center,
children: [Icon(Icons.book), Text("뉴스")],
),
),
)
],
),
floatingActionButton: FloatingActionButton(
child: const Text(
'+',
style: TextStyle(fontSize: 25),
),
onPressed: () {
showDialog(
context: context,
builder: (BuildContext context) {
String title = '';
String description = '';
return AlertDialog(
title: const Text('할 일 추가'),
content: SizedBox(
height: 200,
child: Column(children: [
TextField(
onChanged: (value) {
title = value;
},
decoration: const InputDecoration(labelText: '제목'),
),
TextField(
onChanged: (value) {
description = value;
},
decoration: const InputDecoration(labelText: '설명'),
),
]),
),
actions: [
TextButton(
onPressed: () async {
await todoSqlite.addTodo(
Todo(title: title, description: description));
List<Todo> newTodos = await todoSqlite.getTodos();
setState(() {
todos = newTodos;
});
Navigator.of(context).pop();
},
child: const Text('추가')),
TextButton(
onPressed: () {
Navigator.of(context).pop();
},
child: const Text('취소'))
],
);
});
},
),
body: isLoading
? const Center(
child: CircularProgressIndicator(),
)
: ListView.separated(
itemBuilder: (context, index) {
return ListTile(
title: Text(todos[index].title),
onTap: () {
showDialog(
context: context,
builder: (BuildContext context) {
return SimpleDialog(
title: const Text('할 일'),
children: [
Container(
padding: const EdgeInsets.all(10),
child: Text('제목: ${todos[index].title}'),
),
Container(
padding: const EdgeInsets.all(10),
child:
Text('설명: ${todos[index].description}'),
),
],
);
});
},
trailing: SizedBox(
width: 80,
child: Row(
mainAxisAlignment: MainAxisAlignment.end,
children: [
Container(
padding: const EdgeInsets.all(5),
child: InkWell(
child: const Icon(Icons.edit),
onTap: () {
showDialog(
context: context,
builder: (BuildContext context) {
String title = todos[index].title;
String description =
todos[index].description;
return AlertDialog(
title: const Text('할 일 수정하기'),
content: SizedBox(
height: 200,
child: Column(
children: [
TextField(
onChanged: (value) {
title = value;
},
decoration: InputDecoration(
hintText:
todos[index].title),
),
TextField(
onChanged: (value) {
description = value;
},
decoration: InputDecoration(
hintText: todos[index]
.description),
),
],
),
),
actions: [
TextButton(
onPressed: () async {
Todo newTodo = Todo(
description: description,
id: todos[index].id,
title: title);
await todoSqlite
.updateTodo(newTodo);
List<Todo> newTodos =
await todoSqlite
.getTodos();
setState(() {
todos = newTodos;
});
Navigator.of(context).pop();
},
child: const Text('수정')),
TextButton(
onPressed: () {
Navigator.of(context).pop();
},
child: const Text('취소'))
],
);
});
},
),
),
Container(
padding: const EdgeInsets.all(5),
child: InkWell(
child: const Icon(Icons.delete),
onTap: () {
showDialog(
context: context,
builder: (BuildContext context) {
return AlertDialog(
title: const Text('할 일 삭제하기'),
content: Container(
child: const Text('삭제하시겠습니까?'),
),
actions: [
TextButton(
onPressed: () async {
setState(() {
todoSqlite.deleteTodo(
todos[index].id ?? 0);
});
List<Todo> newTodos =
await todoSqlite
.getTodos();
setState(() {
todos = newTodos;
});
Navigator.of(context).pop();
},
child: const Text('삭제')),
TextButton(
onPressed: () {
Navigator.of(context).pop();
},
child: const Text('취소'))
],
);
});
},
),
)
],
)),
);
},
separatorBuilder: (context, index) {
return const Divider();
},
itemCount: todos.length));
}
각 기능이 구현된 코드에 TodoDefualt를 todoSqlite로 다 바꿔준다.
API 연동해 뉴스 데이터 가져오기
뉴스 데이터는 외부 API를 통해 가져올 것이다.
News API – Search News and Blog Articles on the Web
“Ascender AI has a mission to apply AI to the media, and NewsAPI is one of our most valuable resources. Ascender is redefining how users interact with complex information, and the NewsAPI feed is an essential showcase for our technologies.” Braddock Ga
newsapi.org
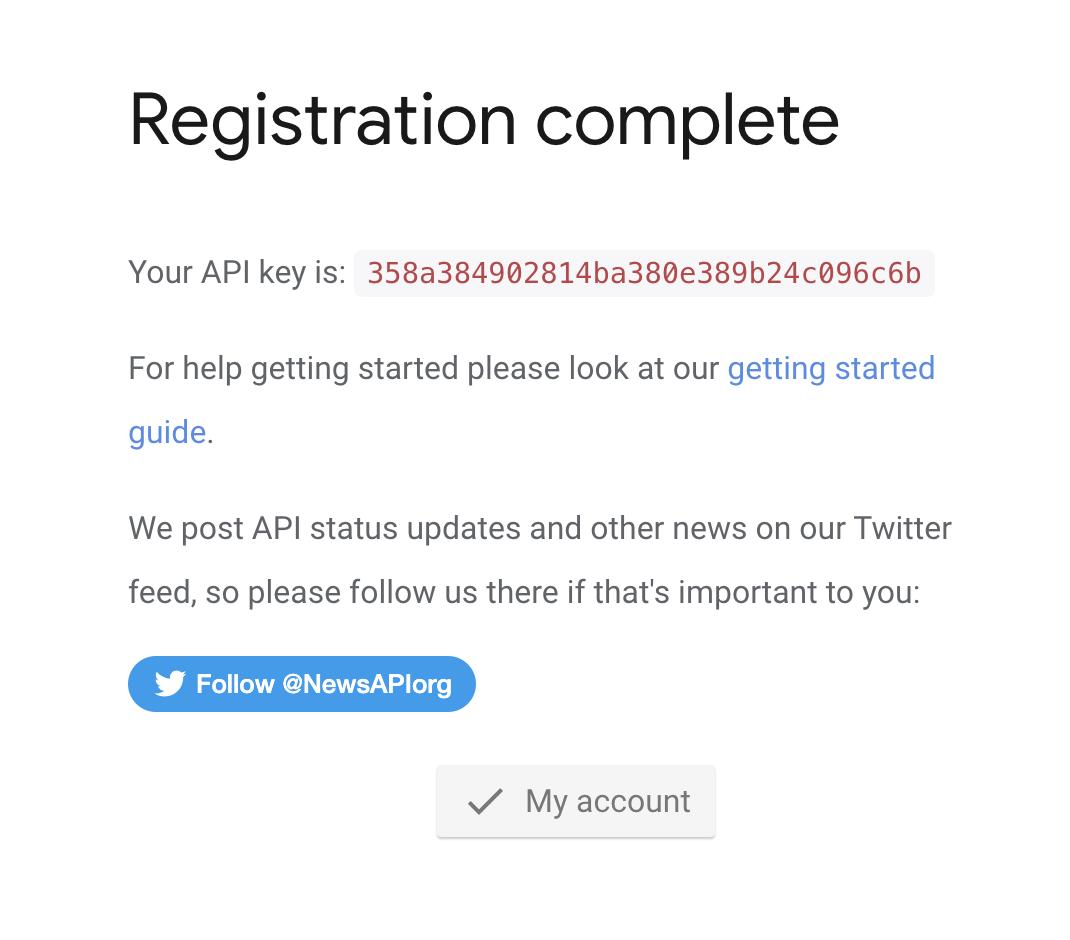
들어가서 계정만들면 API Key를 발급해준다.
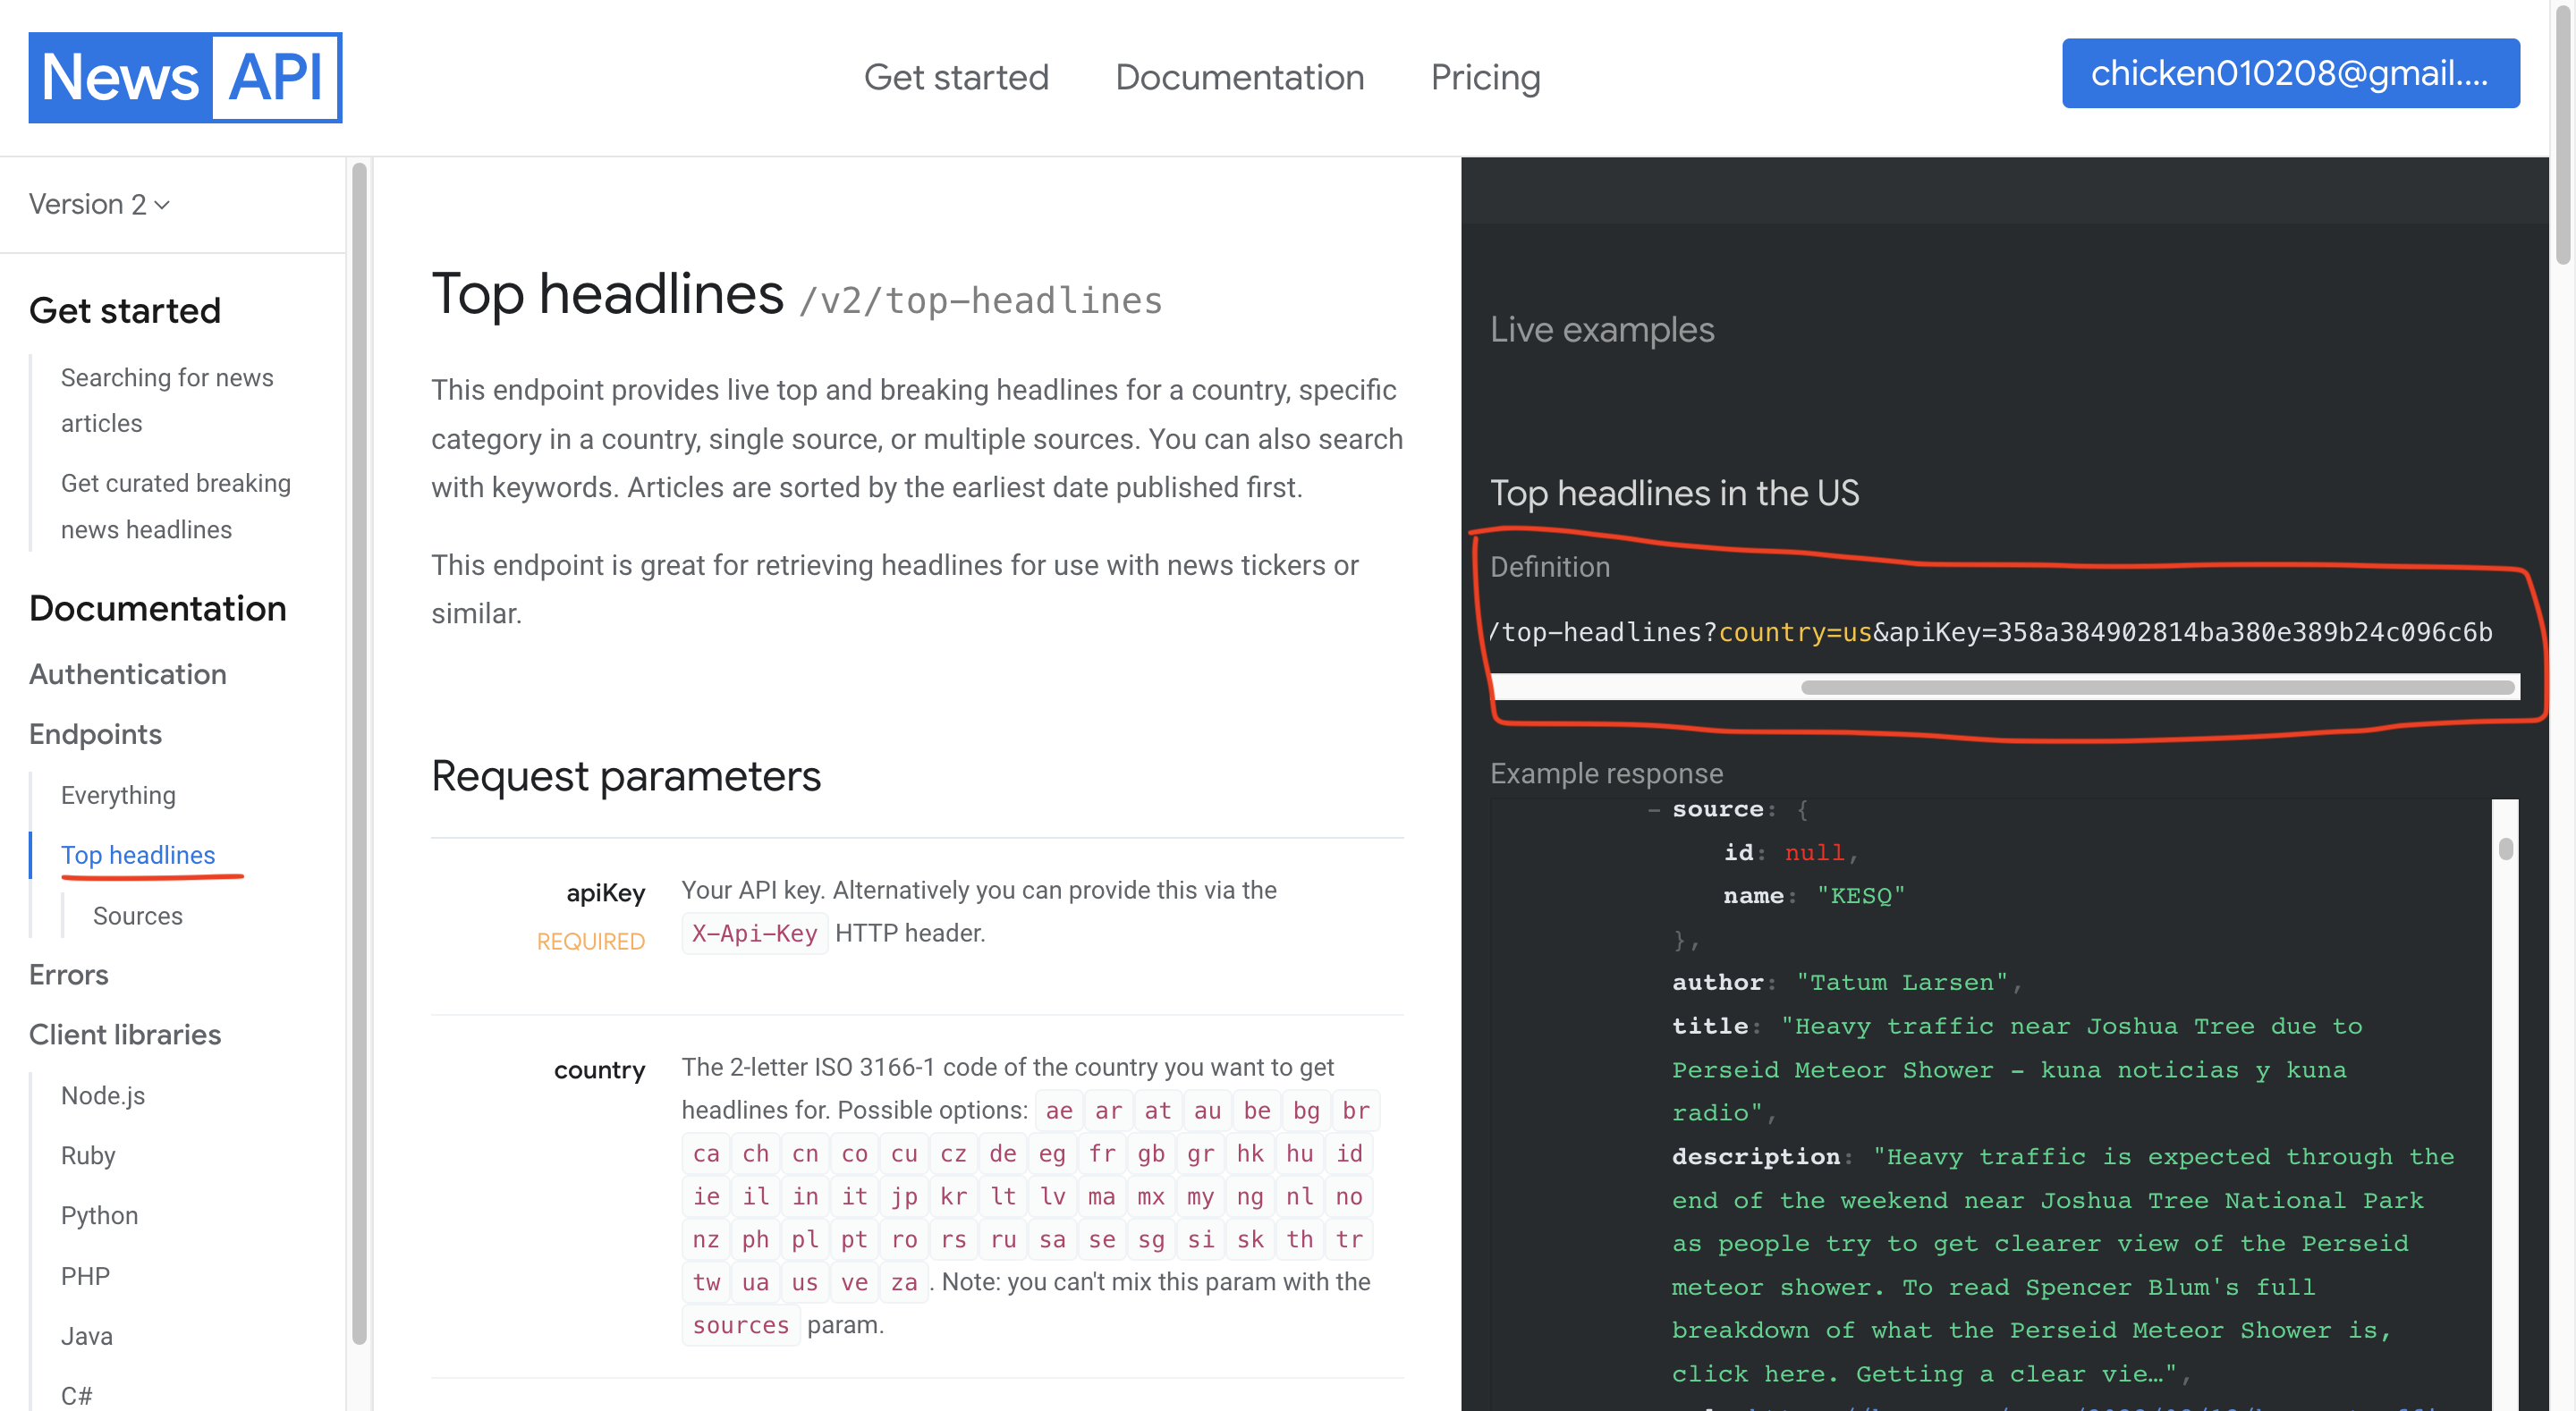
상단 탭의 Get started > 왼쪽 탭의 Top headlines > Definition의 링크복사 >
country=us를 country=kr로 변경 > 주소 다른 창 켜서 복사
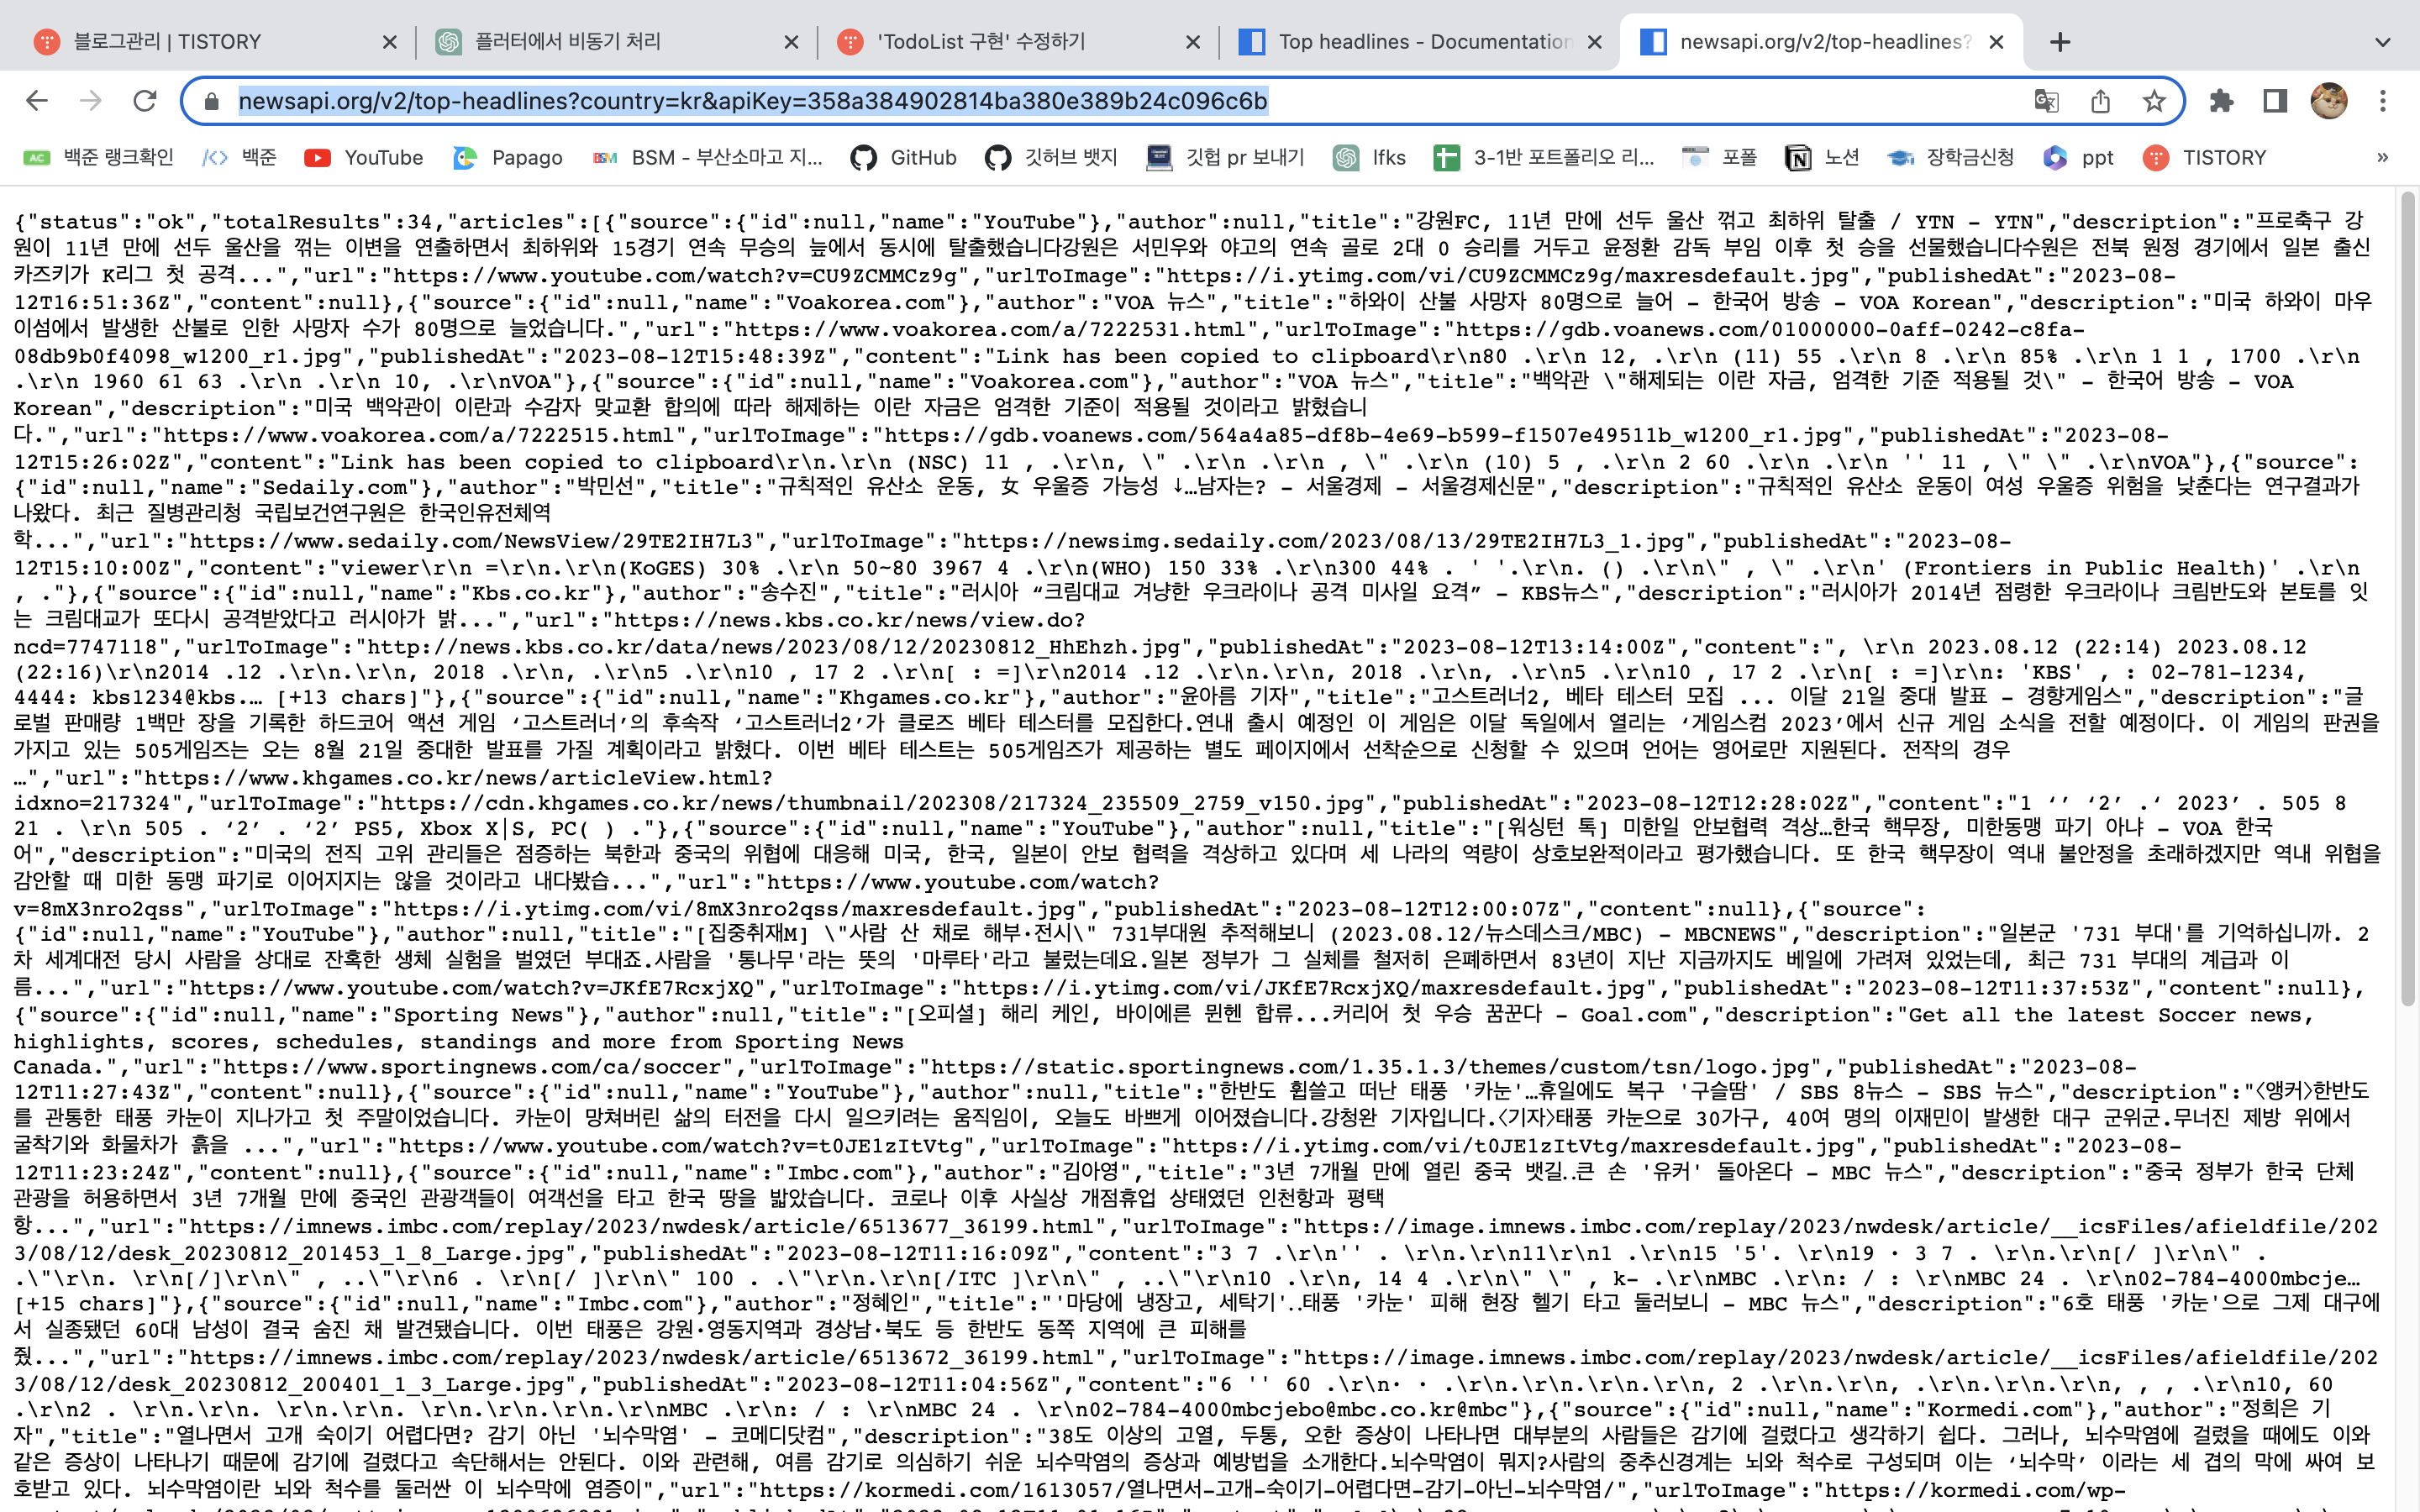
이 Json 형태의 데이터들을 플러터에서 받아와 화면에 띄우는 작업을 할 것이다.
http | Dart Package
A composable, multi-platform, Future-based API for HTTP requests.
pub.dev
플러터에서 http통신을 하기위해 패키지를 추가해주자.
News 모델 작성
class News {
  late String title;
  late String description;

  News({
    required this.title,
    required this.description,
  });

  News.fromMap(Map<String, dynamic>? map) {
    title = map?['title'] ?? '';
    description = map?['description'] ?? '';
  }
}
fromMap()은, Map 객체에서 제목과 설명을 추출하여 News 객체를 생성하는 역할을 한다.
title과 description 키 값이 없다면 ''(빈 문자열)을 기본값으로 사용한다.
NewScreen UI
import 'package:flutter/material.dart';
import 'package:flutter_application_1/models/news.dart';

class NewsScreen extends StatefulWidget {
  const NewsScreen({super.key});

  @override
  State<NewsScreen> createState() => _NewsScreenState();
}

class _NewsScreenState extends State<NewsScreen> {
  List<News> news = [];
  bool isLoading = true;

  @override
  void initState() {
    super.initState();
    setState(() {
      isLoading = false;
    });
  }

  @override
  Widget build(BuildContext context) {
    return Scaffold(
      appBar: AppBar(
        title: const Text('뉴스 화면', style: TextStyle(color: Colors.white)),
        backgroundColor: Colors.blue,
      ),
      body: isLoading
          ? const Center(
              child: CircularProgressIndicator(),
            )
          : GridView.builder(
              gridDelegate: const SliverGridDelegateWithFixedCrossAxisCount(
                  crossAxisCount: 2,
                  childAspectRatio: 2 / 3,
                  crossAxisSpacing: 20,
                  mainAxisExtent: 200),
              itemCount: news.length,
              itemBuilder: (context, index) {
                return Column(
                  children: [
                    Text(
                      news[index].title,
                      style: const TextStyle(fontSize: 18),
                    ),
                    Text(
                      news[index].description,
                      maxLines: 3,
                      overflow: TextOverflow.ellipsis,
                      style: const TextStyle(fontSize: 16),
                    )
                  ],
                );
              }),
    );
  }
}
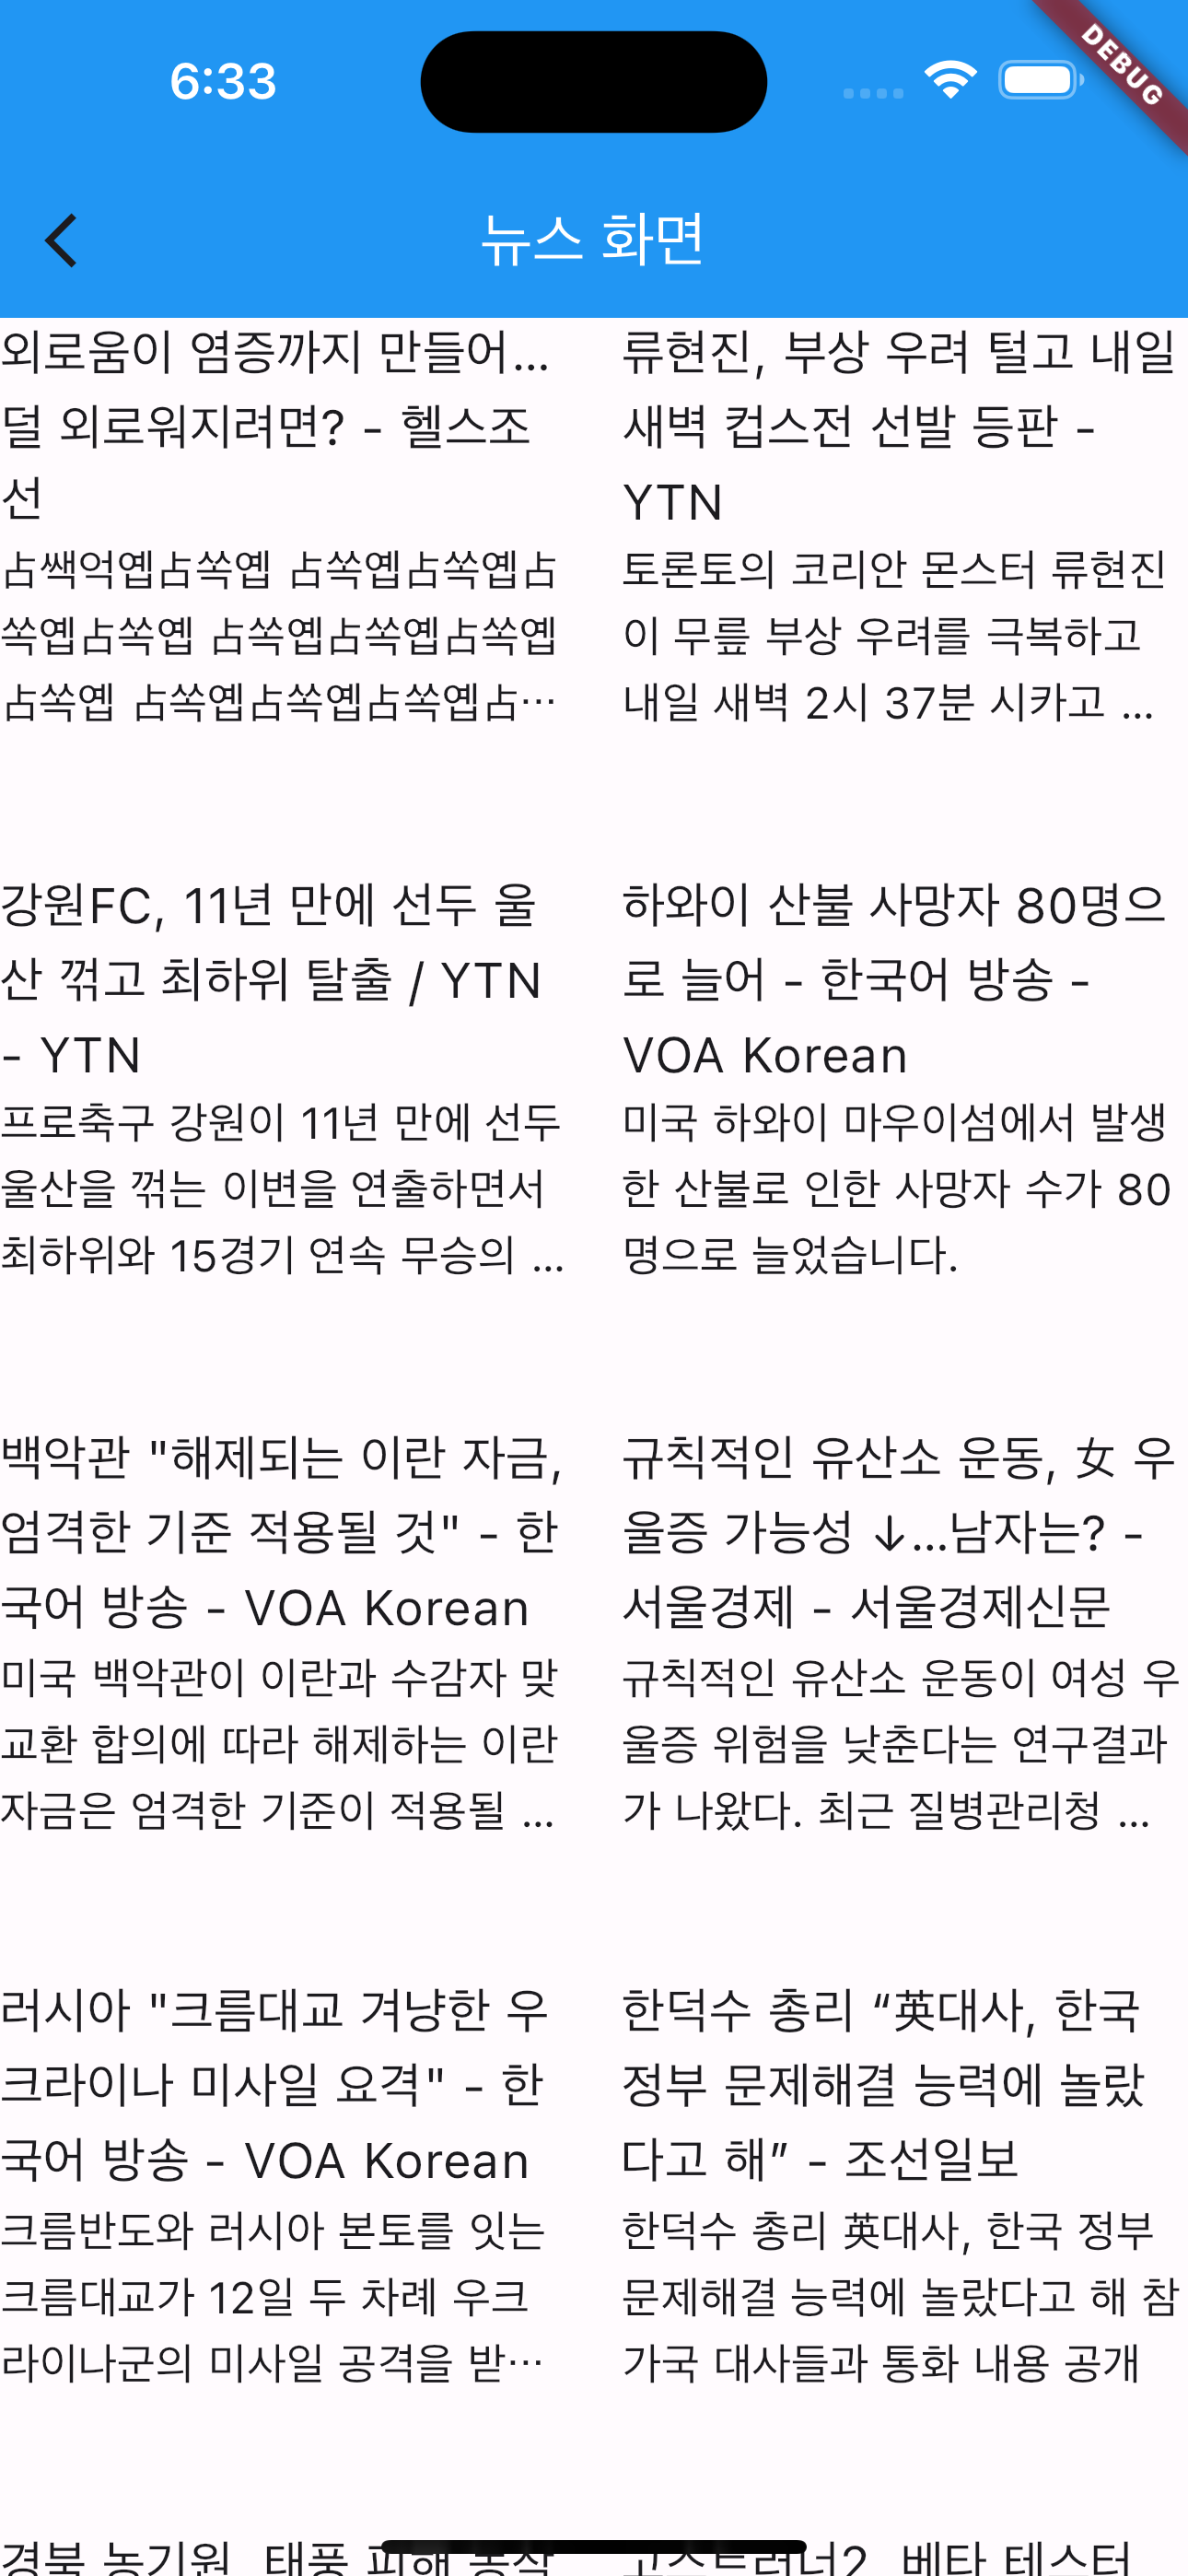
GridView 형태로 구성했다.
뉴스의 article들을 불러와보니까 공간이 부족해서
GridView의 mainAxisEvent값을 200으로 늘렸다.
News provider
import 'dart:convert';

import 'package:flutter_application_1/models/news.dart';
import 'package:http/http.dart' as http;

class NewsApi {
  static String apiUri =
      'https://newsapi.org/v2/top-headlines?country=kr&apiKey=';
  static String apiKey = '358a384902814ba380e389b24c096c6b';

  Uri uri = Uri.parse(apiUri + apiKey);

  Future<List<News>> getNews() async {
    List<News> news = [];
    final response = await http.get(uri);
    final statusCode = response.statusCode;
    final body = response.body;

    if (statusCode == 200) {
      news = jsonDecode(body)['articles'].map<News>((article) {
        return News.fromMap(article);
      }).toList();
    }

    return news;
  }
}
구현해야 할 기능은 뉴스를 받아오는 getNews()뿐이다.
먼저 요청을 보낼 apiURI와 발급받은 apiKey를 선언해
이 값들을 Uri라는 형태의 객체로 반환한다.
그 다음 getNews() 기능을 구현한다.
http.get(uri)를 통해 앞서 만든 uri에 GET 요청을 보내고,
데이터를 받아오는덴 시간이 필요하기 때문에 비동기로 작성한다.
HTTP 응답 코드에 따라 결과를 처리하는데,
200이면 정상적으로 요청에 응답이 왔단 뜻으로 데이터를 전달한다.
이 때 데이터는 body에 담겨오는데 body는 Json형태이므로 이를 jsonDecode로 변환,
여기서 article을 선택한 다음 데이터를 다시 News객체로 변환해 List<News>형태로 만든다.
provider와 UI 연결
import 'package:flutter_application_1/providers/news_api.dart';

class NewsScreen extends StatefulWidget {
  const NewsScreen({super.key});

  @override
  State<NewsScreen> createState() => _NewsScreenState();
}

class _NewsScreenState extends State<NewsScreen> {
  NewsApi newsApi = NewsApi();
  List<News> news = [];
  bool isLoading = true;

  Future initNews() async {
    news = await newsApi.getNews();
  }

  @override
  void initState() {
    super.initState();
    initNews().then((value) {
      setState(() {
        isLoading = false;
      });
    });
  }
Provider를 선언하고, initNews()를 선언해 NewsApi로 부터 News를 받아오고
전부 받아오면 isLoading을 false로 바꾼다.
api 불러오기 예제 끝
깃허브
GitHub - sjy1410/Study-Flutter
Contribute to sjy1410/Study-Flutter development by creating an account on GitHub.
github.com
'무스마 > 플러터' 카테고리의 다른 글
| flutter localization 설정 / 언어변환 탭 만들기 (0) | 2023.10.12 |
|---|---|
| 타이머 앱 (0) | 2023.08.08 |
| 도서 목록 앱 (0) | 2023.07.31 |
| 플러터로 상태관리 (0) | 2023.07.31 |
| 플러터 화면 전환 구현 (0) | 2023.07.30 |